HOW TO SET IT UP
Introduction
Network printing, even if it sounds frightening at first with many names and abbreviations, is actually very simple. First, you need a printer on your local network that understands the data you send to it, second, you have to connect to it to know where to send that data.
Note the use of the word local network. This means your home or office network, behind your own router and firewall. There is no cloud, no registration, nothing uploaded, nothing sent out, no external service to depend upon: everything happens on your own internal network.
Although there are quite a few possible setups, in practice, you will most likely encounter only three of them. Let's examine these one by one:
Your printer connects to a network

Your printer has network connectivity. It doesn't make any difference whether it is with a cable or without. The printer can either have an Ethernet port that you connect to a router or it can have built-in WiFi that connects wirelessly. When you turn your printer on, it will receive an IP address from the router or switch that orchestrates your local network.
As it is a network printer, it will know some (or all) of these usual network protocols:
- RAW (also known as JetDirect, AppSocket, Port 9100 or TCPmon) — The simplest of them all, nothing but the IP address of the printer to send to. You're not likely to find any network capable printer that doesn't support it.
If you have a single printer in your home or office network and you don't care about passwords and access rights, stick with it: the simplest, fastest and most reliable of them all. Only go further if you're sure you need a more complex approach.
- LPD (Line Printer Daemon) or LPR (Line Printer Remote) — Almost as simple as RAW but it can handle more than one printer on the same IP address, so you will also need the name of the printer — called queue name — to tell which actual printer you mean.
You only really need this if you have several printers at the same address. If they all have their own IP address, there's nothing wrong with using RAW for each. Prefer RAW over LPD if you have the choice — LPD is a bi-directional protocol that relies on the responses of the printer making back through the network in a timely manner; it's less reliable.
- IPP (Internet Printing Protocol) or CUPS (Common UNIX Printing System) — The standard printing system of the Linux/Mac world.
This really belongs to the next section where we speak about servers but most network printers can act as a server themselves, so you're likely to find this supported, anyway. Just like LPD, it can handle more than one printer, thus in addition to the IP address, you need a path for the individual printer.
- FTP (File Transfer Protocol) — The same service we use to upload files to web sites. Network printers or print servers can have a designated folder and whatever is sent there gets picked up and printed immediately. Thus, to address them, you'll need the IP address, the folder (directory) name and usually a user name and password.
Using these more sophisticated protocols like IPP or FTP is advisable if you want to restrict access to your printer by providing a user name and password. If you need it, you should know that NetPrinter never uses your supplied name and password for anything else. But, of course, you don't need to take our word for it if you don't want to: simply create an additional user on your system, set it up so that it can't do anything but print and only use its credentials in the app.
There are other network protocols, mainly used on Windows to provide automatic discovery of devices connected to a network:
- WSD (Web Services for Devices) — You might have already seen network printers to automagically appear and disappear from the list of installed printers on Windows — this is WSD at work. The protocol doesn't seem to enjoy an exclusively positive reputation among users. We included it for completeness but if your printer supports other protocols as well, you might want to use those instead. Once successfully installed (which, by the way, might require minutes of "Connecting... Installing..." messages, you have to be patient and wait for it to finish), it will probably work, though.
- UPnP (Universal Plug & Play) — This protocol has a rather bad reputation because of security issues actually not related to printing but allowing access to your internal network from the outside. It's possible that your router or corporate environment disables it, anyway.
You have a WiFi Direct printer
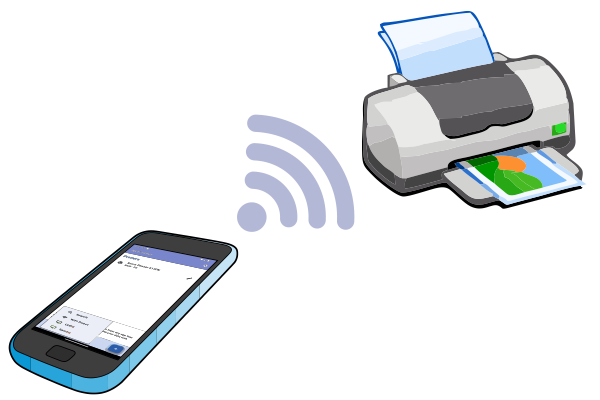
This setup looks even simpler than the one before. Although it uses the same WiFi technology, it is actually different, it doesn't need a network.
- WiFi Direct (also Mopria) — it's a so-called ad hoc mode where your device and your printer talk to each other directly, without a router or any other usual local network.
You need to set up your printer and the details differ from printer to printer, so you will need to consult the manual. Basically, it involves pressing some buttons when instructed by NetPrinter.
Note that many WiFi Direct printers offer both direct access and regular access via a router, using an IP address as described above. If your printer does, it is strongly recommended to choose that over WiFi Direct — believe us, it will print faster and you will have much less connectivity problems in the long run.
You have a Bluetooth printer
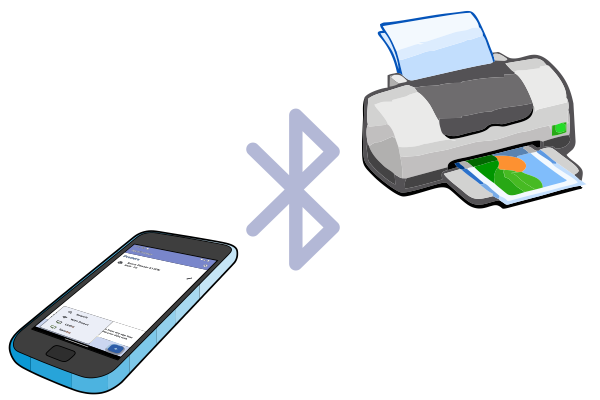
The other widespread wireless connection that works even without a full network:
- Bluetooth — your device and your printer talk to each other directly, without a router or any other usual local network.
But there's an important detail you have to be aware of: quite a few printers only support Bluetooth Smart/LE (BLE), not the full solution. This is a simpler variant that can only be used to discover printers but not to actually print to them, as strange as it might sound. In this case, although NetPrinter will find them, you'll have to use one of the other available options (like WiFi).
If you have the one you can print with, you need to pair your device with your printer first. As NetPrinter doesn't want to be involved with the security of your device, it will simply send you to the usual system dialog to do the pairing. Once done, you will see the printer among the selected printers ready to be used.
Your printer has no network connection
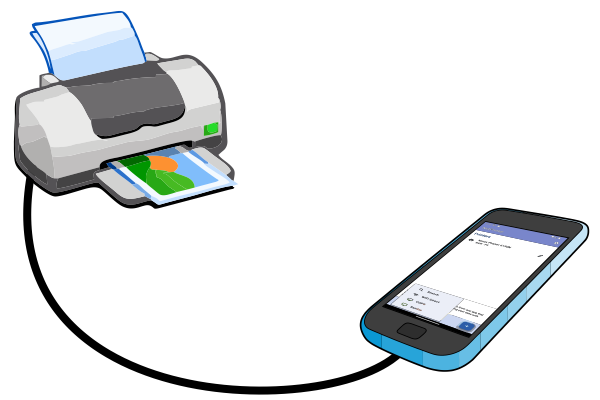
In this day and age, this probably means USB only. If your phone supports USB On-The-Go — or you have a very simple and cheap adapter —, you can connect the printer directly to your phone. NetPrinter has an extra item in the Add printer menu to look for directly connected printers:
- USB OTG, On-The-Go — a direct connection where roles are reversed, your phone acts as the host controlling the other device.
You need to give a permanent (also called default) permission to the phone to connect to the printer. If you only give a temporary one, the printer will have a new, different address the next time you connect to it and the app won't be able to access it.
But that's not the only possibility. You do have a desktop computer or notebook, don't you? Chances are you want to leave the printer connected to the computer as before and still be able to print to it from your phone as well.
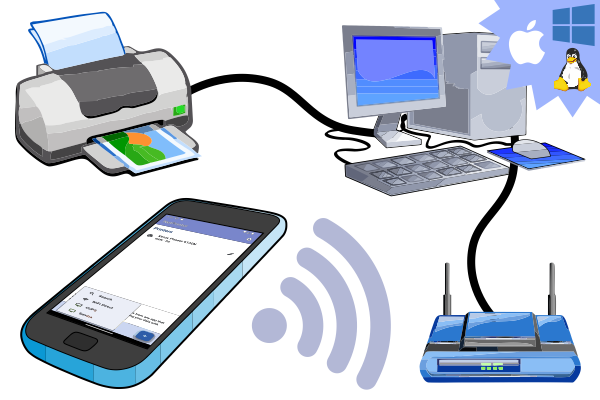
Either Windows, macOS or Linux, you'll have one of the following:
- IPP (Internet Printing Protocol) or CUPS (Common UNIX Printing System) — The standard printing system of the Linux/Mac world. Any Linux desktop distro will support it out of the box. The Mac just as well (remember to check the box that you want the printer to be shared on the network). In addition to the IP address, you need a path for the individual printer, and you're good to go.
- Samba (SMB, Server Message Block) — The same in the Windows ecosystem.
Provide a share name for the printer (this is the name that tells apart the printers connected to the same computer) and you can print.
If you get a warning about the old v1 version, please, take it seriously: it's a very old and very insecure protocol, even if some older printers, routers and print servers still use it. Many manufacturers provide firmware updates for these older devices, check if yours can be fixed, too. Your entire network can be very vulnerable if you have Samba v1 devices on it. Check out all alternatives before you decide to keep using v1.
You can select the one appropriate to the system you use on your computer. But note one thing: you will use your computer as a print server. It will connect the printer to the network but it will not take part in the printing process itself. Most importantly, it will not convert from one format to another, all it does is to send the data to the printer. You have to make sure your printer understands, completely on its own, the data format you send to it.
Server mode
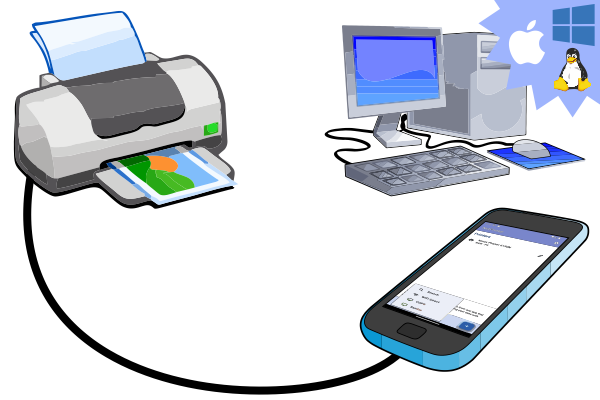
The premium version offers yet another, interesting solution: you can connect the printer to the phone and use Server Mode to share it with other devices. Your phone becomes the print server that offers up the printer to the rest of your network, not the other way around. You probably don't want to do it on your regular, daily driver phone, it wouldn't be very convenient but you might have an older, already unused phone lying around that you could use for this purpose.
You can decide whether to start the Server Mode automatically when the phone starts, always running in the background, or only when you intent to print and start NetPrinter specifically. The former certainly means more battery consumption and some phones might more agressively block background processes when the phone sleeps, so it's up to you to decide.
Depending on the actual protocol selected, printers might be discovered from your other devices on the network while the server is running or by starting the special discovery mode when you edit the server mode for the particular printer. Note that Android reserves port numbers below 1024 for its own use, so even if the protocol uses a lower port number usually, you have to select one above 1024. Just make sure you use the same port for both the NetPrinter server and in the client you what to print to it from.
The data to send
Now comes the single most important part of network printing. You already used your printer from your computer, so you have some driver installed there. This doesn't count! Network printing has no concept of drivers. Even if you use your Windows, macOS or Linux computer to connect the printer to the net, the driver won't be used, all the computer does is to simply transfer anything you send to the printer. NetPrinter itself has to provide your printer with all the data it understands. Fortunately, it supports more than 6,000 printers (with new formats added regularly) so let's take a look at all those formats:
- PDF — This is the most widespread of all, the same document format you see everywhere. Many modern printers understand it directly.
- PWG (IPP Everywhere) — Various manufacturers have been trying to suggest a common print format that everybody can use and everybody will understand for decades. More or less, they all failed. This is the only modern one that can really be considered free and universal, and a long and growing list of printer manufacturers embrace it.
If your printer understands any of these, it's best to stick with one. Only go further if you have no luck with either of the above:
- PCLm, PCLmS (Mopria) — A simplified PDF, understood by modern WiFi Direct printers. Note that, in spite of the similar name, this format is completely unrelated to the older PCL below.
- URF/Airprint (of Apple) — Being Apple's own format, their Airprint printers all accept it and some other printers might (although most of those understand PDF or PWG, too).
- PostScript — The classic desktop publishing printer language, the common language of all graphics people and the printing industry. Better laser printers, especially color ones will support it.
- PCL 3 GUI, PCL 5, PCL 6/XL (of Hewlett-Packard) — The old, de facto standard of Hewlett-Packard printers of yesteryear. If you have an older office network laser printer still kicking around, chances are it understands PCL.
- HP-GL/2 (of Hewlett-Packard) — A plotter language but later versions added an extra format called RTL that allows the transfer of images.
- ESC/P2, ESC/P-R, ESC/PAGE (of Epson) — Modern variants of the venerable ESC/P language of earlier Epson printers. It's still in use by a large selection of their color inkjets and laser printers.
- GDI — Simpler printers of many manufacturers (eg. Canon, Dell, Hewlett-Packard, Lexmark, Samsung, Toshiba, Xerox) are so called host-based, Windows GDI printers that depend on their full printing knowledge built into the software driving them. Note that this makes them relatively slow to print to, especially in color. If you use this format, you will have to select your printer model from the list of supported ones.
- XPS — Microsoft's intended alternative to PDF. Mostly unused, neglected and unknown but some printers support it natively.
- ESC/POS, ZPL, TSPL/TSPL2, StarPRNT (of Epson, Zebra, TSC and Star) — Label and receipt printers.
- Straight JPG or PNG image files — Photo printers accept images when received directly. Try it if all else fails and the printer manual mentions it.
One question remains, though: do you know what format your printer accepts and understands? If you do, it's easy to select. But if you don't, unfortunately, there's no way to query the printer for what it supports — there's no standard method for this. That's why we collected a large database: just try our format selector that knows a humongous amount of printers by manufacturer and model name, and can tell you the formats it supports.
To set it all up, finally
With all the details discussed above, you could already configure your printer manually with the format, protocol and any additional data required. But today, the various printers and servers will usually help you. There are several discovery mechanisms under many names: Bonjour, Avahi, mDNS, Multicast DNS, ZeroConf, DNS-SD, CUPS, IPP Everywhere, Mopria. Just enable these services if you have them in your printer and use the search menu on the main screen of the app.
Search uses most of these discovery solutions to scan your local network for printers reporting back. If present, you'll receive their descriptions and can accept them automatically. You might still need to tweak some details and test if they really work with your settings: the Test page button will try to send a nice test print page to the printer.
Being comprehensive in its discovery protocols, Search should find most if not all printers on your network. Still, if you need, you have CUPS/IPP and Samba which are specific. They require you to provide the IP address of the CUPS/IPP print server (or the Linux/Mac computer, or the printer itself) or the Windows computer. The rest will be discovered automatically.
WiFi Direct looks for compatible printers (eg. Mopria certified ones) in your vicinity and lets you select them. Note that, once connected to your local network, some printers no longer report themselves as printers but as regular network devices. If you fail to see your printer discovered in this mode, try to switch to All devices in the option menu in the upper right corner of the app.
If both Search and WiFi Direct list the same printer (most WiFi printers offer both kinds of access nowadays, after you have set up the printer initially), it is strongly recommended to choose the first one — it will print faster and you will have much less connectivity problems.
How to use?
Just like any other printer. When you're ready to print, select the Print menu, icon or feature from any app supporting printing, your configured printers will be there in the list, ready to be used.
If an app lacks printing facilities, you can also try to share your images, texts or other content directly with NetPrinter, using the familiar sharing button and interface. This leads to the same system printing dialog.
Note that Android puts up a standard warning for any printing service when you make your first print. No matter what it says, rest assured: NetPrinter doesn't send out your data to any server, only to your own printer.
Support development
The paid version has several bonus features to express our appreciation for your support:
✓ There will be no ads, to start with.
✓ Server mode to use your phone as a print server, printing to the connected printer from other devices on your network;
✓ Printing more than one page on a paper, this is called N-up printing;
✓ When you share several images with NetPrinter, they will be printed in a collage layout instead of a simple, boring grid, with adaptive sizes to show each image in full, without cropping.
✓ You can select from several display options when printing image and graphics material. Although these dithering methods are slower, especially at higher resolution, they give a much more pleasant look on black & white printers and some CMYK inkjets:
- Normal — The standard, ordered dithering. It exhibits a noticeable crosshatch pattern.
- Halftone (or AM screen) — A reprographic technique used in traditional press to reproduce different shades with dots of varying size. When used to print color images, the standard alignment of the different colors at set angles results in visible small circles called moiré or rosettes.
- Dithering — Various dithering methods used in computing, based on error diffusion. They exhibit various artefacts, especially in light areas.
✓ You can fit the printed page to the page size of the printer.
✓ You can change the brightness of the printout, making it darker or lighter.
✓ You can set up a printer to save, share or send (via e-mail) any incoming printer file (not all formats are supported).
Some of these options appear among the settings of the printer, others can be found in the More options section of the usual Android printing page.
Permissions: why?
We know NetPrinter asks for quite a few permissions from you, so we thought it would be fair to describe what they are actually for, how and when they are used exactly. Only the following basic permissions are needed for regular operation:
- Network access — As a network printer app, the need to access the network is probably understandable.
- Prevent phone from sleeping — It would be rather inconsiderate of your phone to doze off in the middle of a print job. NetPrinter might ask for a so-called wake lock for the duration of the print job to keep it awake while the printing lasts. Not further or when you don't use it at all.
- Advertising ID, Google Play billing service — As an app that uses advertising to help support the development, we use Google's advertising and in-app purchase library. Whatever they do with your ad data is actually their decision, not ours, but because these embedded libraries become part of NetPrinter, we have to declare them.
WiFi Direct permissions only apply if you use this discovery mode. Just using a regular WiFi network you are normally linked to at home or at work to connect to the Internet doesn't count, these permissions are not even asked for then:
- Location — The app does not get your location at all. It isn't interesting for a printing app, after all. When you use WiFi Direct to discover WiFi devices around you, the app will inevitably see those devices. And the name of all those networks around you, especially in densely populated major towns, can be enough to find your location quite precisely. This is why Android insists on you granting this permission when you want to do discovery: NetPrinter simply won't get any answer from the system if you don't.
- Wi-Fi connection, disconnection, change state — Just like above with the location, this comes with WiFi Direct discovery. Discovery mode is considered a different state, so NetPrinter has to be able to initiate it, and to connect to these new devices so that you can use them for printing.
Bluetooth permissions only apply if you use such a printer:
- Bluetooth settings, pair devices — In order to discover a Bluetooth printer, connect and print to it, you have to grant the appropriate permissions. Older Android versions also ask for location permission (for reasons discussed above). Newer Androids already have a specific permission for looking for Bluetooth devices around you.
If you don't have the premium version or don't use the server mode, you don't need to grant this permission:
- Foreground service, run at startup — The premium version offers a server mode where you can use NetPrinter in the opposite direction, too: not just to print from your device to a printer somewhere in your network but to print from other devices on that network to a printer connected to your phone or tablet. In this mode, the app needs a place in the usual Android notification area that can run even if you work in other applications.

